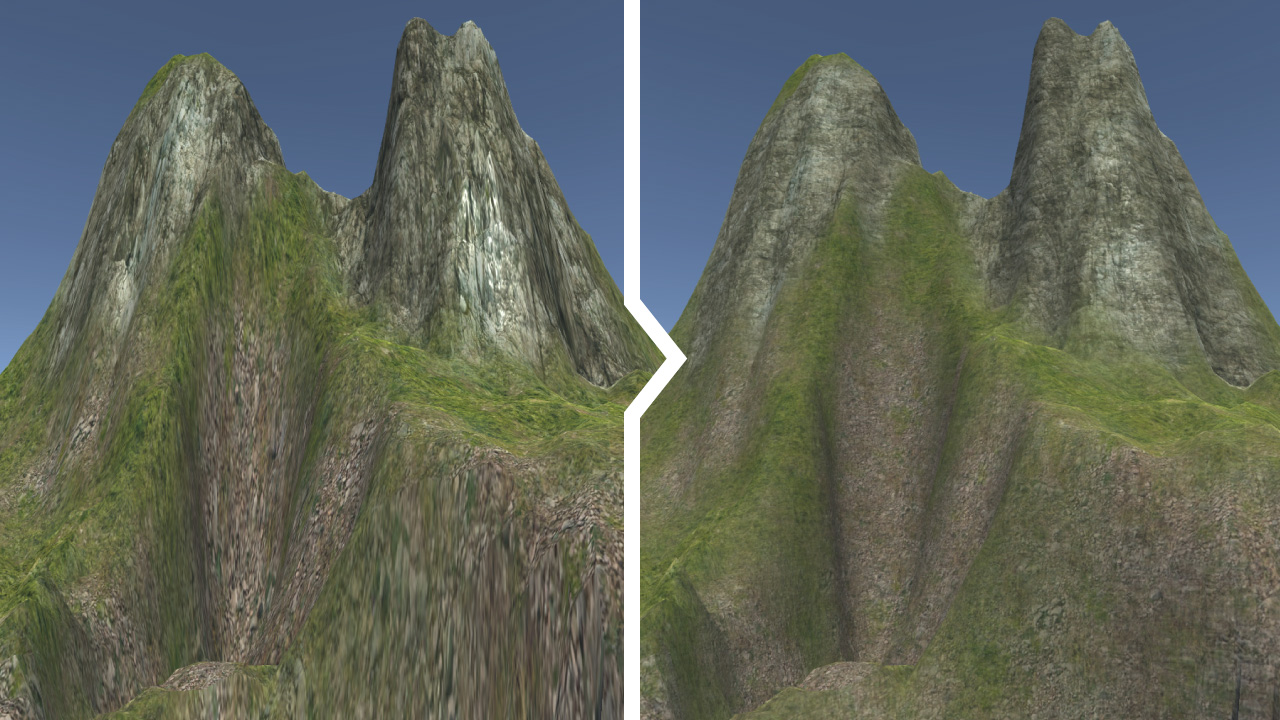
You have probably experienced stretched and ugly-looking textures on steep slopes when using the terrain engine in Unity. It is caused by a simple planar UV mapping that is employed by the built-in terrain shader. The problem can be solved by applying the triplanar texture mapping. It gives nice-looking textures on vertical surfaces and other complex shapes. This tutorial explains how the technique works, and it provides simple code examples.
Instant Solution
If you are not familiar with Cg/HLSL shading language, then you may consider downloading a ready-to-use shader from the Unity Asset Store.
The Problem
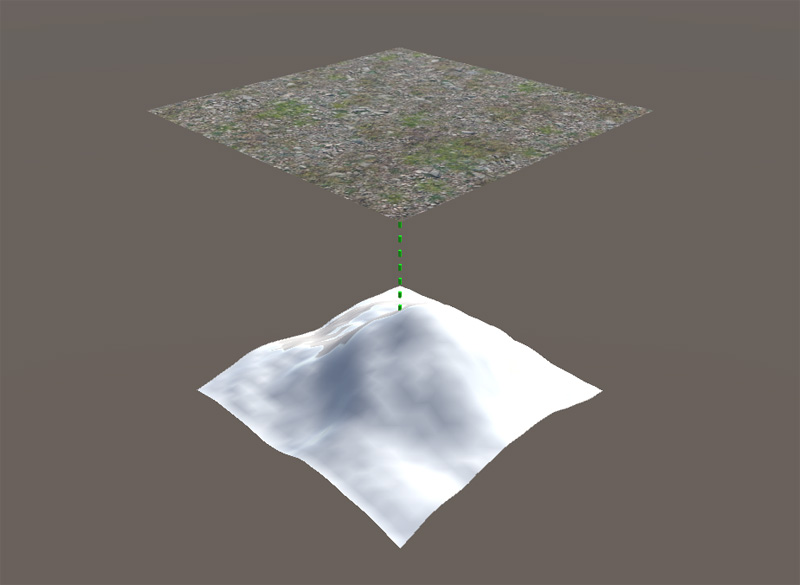
First, let us focus on the problem. The Unity terrain is textured according to the UV coordinates. They are evenly distributed on the X-Z plane. The Y-axis is ignored, and a texture is stretched on tall objects. It gives relatively good results if there are no steep cliffs, or a player looks on the terrain from above.
Triplanar Mapping
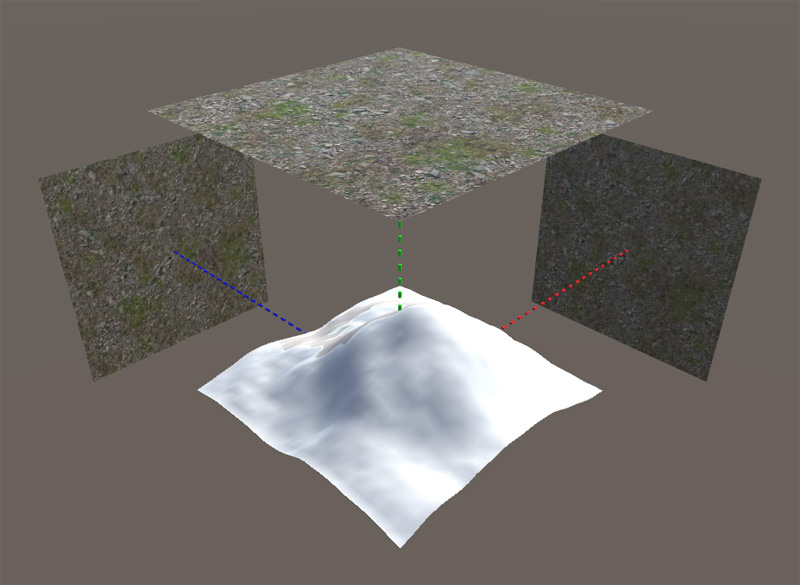
There are many ways to solve this problem. One of the simplest is the triplanar mapping. It samples a texture from three different directions: X, Y, and Z. Finally, the result is blended into one color. It gives smooth transitions between surfaces at different angles.
Implementation
Let us look at an example implementation. The code that uses the default planar texture mapping looks similar to this:
// input variables
sampler2D _Texture;
float2 uv_Texture;

// sampling
fixed4 color = tex2D(_Texture, uv_Texture);
In the code above, the texture is simply sampled according to the provided UV coordinates. In the next part, we will modify the sampling method. The triplanar technique uses world-space coordinates instead of UVs. Let us begin by calculating colors mapped for each of the three directions:
// world-space position
float2 worldPos;

fixed4 cX = tex2D(_Texture, worldPos.yz);
fixed4 cY = tex2D(_Texture, worldPos.xz);
fixed4 cZ = tex2D(_Texture, worldPos.xy);
The three colors are blended using the normal vector:
// world-space normal vector
float3 worldNormal;

// we drop the sign because we do not distinguish positive and negative directions
float3 blend = abs(worldNormal);

// the values should sum to 1 but we must avoid dividing by 0
blend /= blend.x + blend.y + blend.z + 0.001f;

// blending
fixed4 color = blend.x * cX + blend.y * cY + blend.z * cZ;
The same method can be applied for sampling normal maps.
Summary
The discussed technique provides much better graphics, but it is slightly more computationally expensive. However, if performance is not critical, then it is more efficient than preparing the same terrain in 3Ds Max or Blender.
Recent Comments